Friday, July 20, 2012

The Coast(er) is Clear!

Today's project...make your own coasters from free paint samples!  It was inspired by this pin.  It was very easy.


So you'll need the following
  • Clear Acrylic Gloss Coating
  • Mod Podge (I had matte, but I'd suggest buying the glossy kind)
  • Tiles (I bought mine at Lowe's for .77/piece)
  • Paint Sample Cards (Free at Lowe's..the ones at Walmart are only about half as wide).

I chose the paint samples with the words on them, but then I found some that were just solid colors as well.


First, I trimmed a little off the right side of the cards, because it was curved and I didn't want to fight with gluing them down.  Then I cut a little off the top until it fit on the card correctly, then glued it down with the mod podge.


After I glued it down, I put something heavy on top (thanks for the jewelry box dad) and left it there for about thirty minutes.

Then, just paint the glue over it.  I did about five really thin coats.  When you paint it, it'll look thick and glue-like.

Cameo from Jordan's toddler table, lolz


Once they dry completely


spray the acrylic gloss coating and let that dry completely as well.  

That's it!


Wednesday, July 18, 2012

I'm Hooked

So today we have to do a "craft type project."  I chose to do this pin, and when I clicked on it for how-to instructions, the pin was gone!  Don'tcha hate that?  So I'm posting this blog so it'll never happen to one of you pinners ever again!


First, you'll need to assemble your items.


  • A board...it doesn't have to be pretty, we're covering it up.
  • Glue (I used Tacky Glue because it's strong and it's what I had)
  • Fabric (I purchased 1/3 yard for $1.64 at Hobby Lobby, it was 30% off)
  • Hooks (I also bought these at Hobby Lobby, they were $1.99)
  • Ribbon (if you so choose)

Next, cut the fabric to fit, like so:


Then get to glue-ing.  Think.....wrapping a present.  Pause for gratuitous use of glue right here!  Oops.


I cut a little off the edges because I wanted a really tight fit, then I tucked it under and glued the sides so the fabric had something to stick to.


Step One Complete!


Then I let the glue dry.  I gave it a little help by putting something heavy on it.  I let mine dry for about an hour because I had an errand to run.  It's dry when the glue is clear.

Next you'll need to adhere your ribbon.  Since my ribbon was rope-like, I ultimately ended up just tying it in a knot, which (surprisingly) worked great. 


Next....you need to attach the screws.  This was HARD because the wood I bought wasn't some cheap plywood type, it was the wood that plaques are made from.  So, I came up with this trick and you are SO WELCOME.  I just screwed in a real screw the size of the hooks, then screwed in the hooks.  Simple!  GENIUS.


Next, I attached a hook to hang it by (from my rarely used picture hanging kit). 
Jordan wanted to help.


And that's it!  Hope you enjoyed this one, it was very easy!


Monday, July 16, 2012

Let's Wok On! (HomeMade Crab Rangoon, Baked and Fried))


So one of my groups is doing a Pinterest challenge.  We've committed to doing one challenge per day for at least six of the next seven days.  So today I chose to do a recipe.  I love crab rangoon, and frequently have a taste for it, but had NO IDEA how easy it is to make.  Here's where I found the recipe.  Almost so easy my patented step-by-step instructions will seem silly, but uh, whatev, here we are.

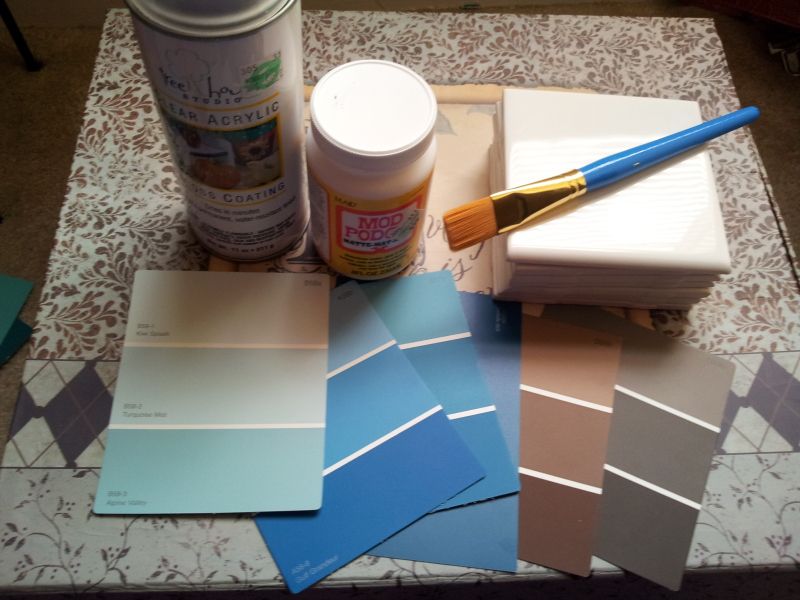
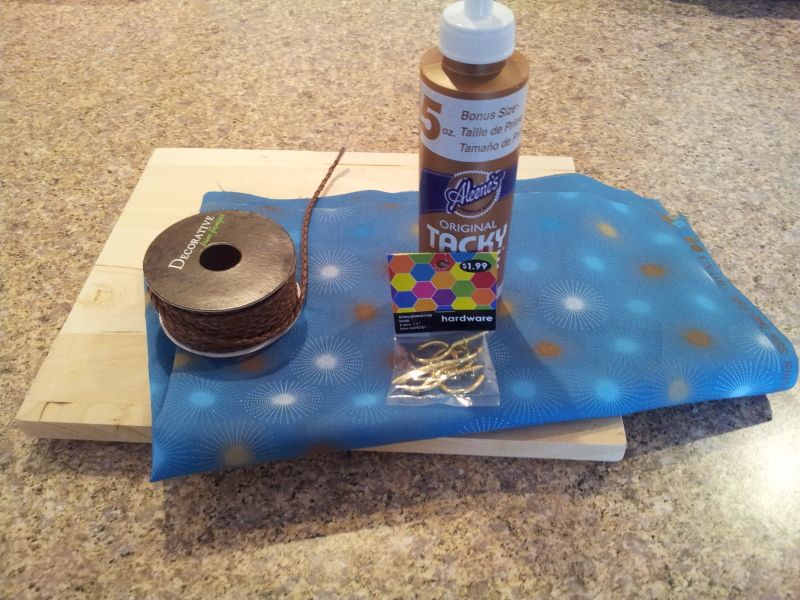
First...buy stuff.  I'm no Betty Crocker, but some some of this stuff I just happened to have and so should you, lol.  I mean, cream cheese has so many uses....from here on out, just start stocking it.

1/8 tsp garlic salt
1/8 tsp Worcestershire sauce
14 won ton wrappers (which is silly, they come in a pack..buy a pack, don't open one in the store people....)
1 small green onion
5 oz imitation crab
4 oz cream cheese

If you clicked on the original link, you'll see I altered the recipe, cuz that's how I roll.

Then assemble it all....right here, I would suggest leaving the cream cheese out to soften, because it was REALLY freaking hard to mix.  I mean, who knew you needed bulging biceps to stir cream cheese?


Next, take your cream cheese, garlic salt and Worcestershire sauce and mix it until it's smooth and creamy.  Go ahead and take a break now...that was hard work.  Also, if you're like me, your son has noticed you're in the kitchen and requested PB&J.


Now you can combine the crab and green onions.  Not gonna lie, I did it all at the same time.  I have no idea why the original recipe said do them separately.  This mom is a time-saver!  *insert rant about how you can't just buy a small green onion and how you have no idea what to do with all these green onions now /endrant*


After that...get out your won ton wrappers, and heat up your wok (if you're like me and trying both you'll also need to heat up the oven to 425).  Also, you'll need some water to use for the edges. 


Now place about half a spoonful of mixture into the center of the wrapper, then moisten the edges and pinch (I moistened around the entire square).


And it should look like this:


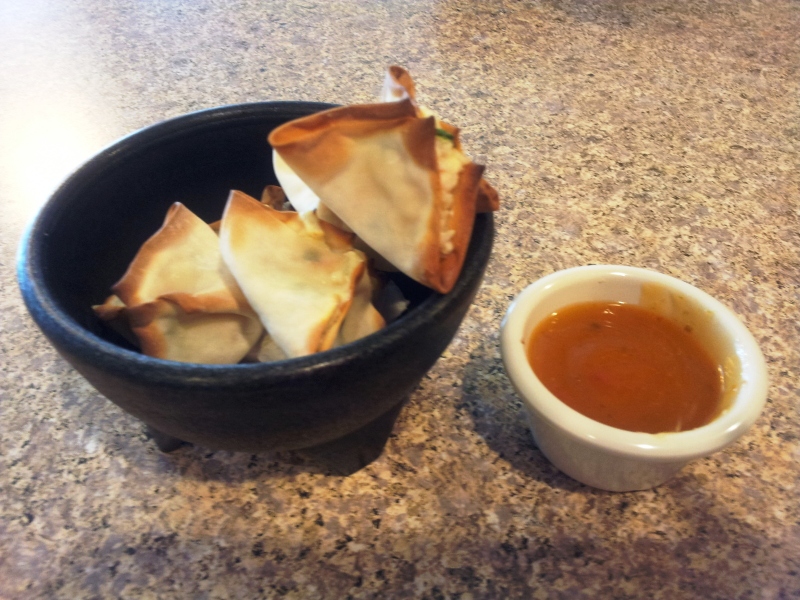
I also did some where I did a triangle as well...instead of pinching I just folded it over.

For those you're baking, place on a baking sheet with a little non-stick cooking spray.  Otherwise, it's time to get your WOK ON!


When they get to a nice brown, flip them over so the top gets brown as well.  This is the one thing I didn't like about baking them, because the tips browned much faster than the rest and I took them out because I didn't want that to burn.

The baked ones should be in the oven from 8-10 minutes...but my oven is a bit funky so next time I'll probably do it a little lower for a little longer so it will brown all over).  They were still crispy (the baked ones) and delicious...I was very surprised to find there wasn't much difference between baked and fried...I'd eat them both!  According to the original recipe, if you bake them, they will only be TWO Weight Watchers points, if anyone can verify that please leave a comment..it didn't say use light cream cheese, but I can't really tell the difference and you probably can't either!


And fried:


Thursday, June 14, 2012

Fake Out The Take Out: Chicken Nuggets


I decided to try my own take out fake out meal of the nuggets that are fil-ay's of chicken (see what I did there?)  Well, after my quest for the perfect Polynesian sauce, I made one that was close (except brown) but very thin and will try again when I buy some cornstarch.  I found two blogs via Pinterest that made these nuggets and took what I felt were the best ingredients from each, but giving credit where credit is most definitely due here is the link to blog one (which also includes a recipe for their sauce, which I didn't attempt since I am not a fan of honey/mustard sauces) and blog two.
 
 I used three large chicken breasts, which I cubed into pieces.  Looking back, the pieces should have been smaller so they'd be bite sized...if you use more chicken, feel free to adjust your measurements accordingly to make sure your chicken is covered.

First, ingredients for what I will be referring to as the milk mixture:
  • 1 egg
  • 1 cup of milk
  • Pickle juice (looking back, next time I will probably just combine all of these and marinate them all together rather than doing the pickle juice first,then the milk mixture later).

 Second, here are the ingredients for what I will be referring to as the flour mixture:
  • 1 1/2 cups of flour
  • 2 TBSP powdered sugar (very important ingredient, do not substitute!!!)
  • 2 tsp salt (since I added salt and pepper to the pickle brine I changed to 2 tsp instead of 4)
  • 1 tsp pepper
  • 1 tsp paprika 
Also, you'll need cooking oil.  Peanut oil is what is suggested, but I used vegetable oil, because I wasn't going to the store one more stinking time.  Ha ha.
After reading over 200 comments on both blogs, I decided that I was going to take the chance and marinate them for an hour in pickle juice.  Neither blog called for this, but it was a rampant suggestion in the comments.  Some people swore by it, and some people said that it was an urban legend.  Some said it was true once, but now they use buttermilk.  Whatever, I'm a rebel.  After cubing the chicken, I soaked them in a pickle juice, and some salt and pepper for an hour.  There's really no measurement, just use as much pickle juice (with water mixed if needed) to cover your chicken.  I had a regular jar of hamburger dills in my fridge, and they covered three breasts just fine).


Meanwhile, I ate some lonely dry pickles.  I had some unexpected guests, who unknowingly signed up as guinea pigs.  Yay for girl time!


Then, since one of the blogs called for marinating for two to four hours in a milk mixture, I decided to do that too since I had the time (I started the first marinade for lunch, but just decided I'd serve it for dinner instead).  Again, next time I will combine the pickle juice step and just marinade them all at once together for 2-4 hours.


 For this time, there was a little bit of pickle juice left in the bowl, I just left it in when I added the milk mixture.

 When they were finished marinating, I coated them with the flour mixture.


I read in some comments that some people had bad luck with the flour mixture falling off, so one of the authors suggested refrigerating for a few minutes.  So, after coating them with flour, I put them in the refrigerator for five minutes or so, while the oil heated up.

And voila!  That's literally all I did!  The first batch I took out when they were pretty light, because one of the blogs said take them out earlier than you'd think, but they were a little...chewy.  Not gross, still edible and dead on, but I left the second batch in longer and they turned out perfectly!


What...no paper towels or napkins?  Welp, I always have coffee filters, which is what I used to catch the grease.  I'm basically a kitchen ninja.

I hope you enjoyed, and have learned from my trial.  I'd love to hear if you found any other shortcuts, or ways to enhance them...and especially if you crack the code of the fantastical polynesian sauce!


Sunday, March 18, 2012

At the end of the rainbow...is CAKE!

So I've made this before, and always meant to post a how-to blog, because people never believe how easy it is! A friend invited me to a Saint Patrick's Day cookout, and suddenly I had the perfect excuse!  It's very easy, and everyone will feel lucky they know someone so amazingly crafty!  :)

All you'll need is a boxed cake mix (unless you're much more Betty Crocker-ish than I), food coloring (they have neon too, which I've used before and loved) and frosting.  Pretty much exactly what you'd need for a cake).


Once you've mixed your cake mix (I had a moment when I thought I only had two eggs, lol), you'll then need to separate the mix into however many colors you plan to make.  Since mine was for St. Patrick's Day, I chose classic rainbow colors (red, orange, yellow, green, blue, violet).  Fun times creating these colors!


Then, just start pouring!  Since I have the slightest touch of OCD (by slightest I mean quite a bit) I poured mine in the order of the color spectrum, lol.  Just pour the first one, then our the second on top and so on....


Then, bake it....mine did this weird bubble thing at the top, but I'm no baker, so I don't know if this is normal or not.  At first I was going to cut it off to level the cake, but in my case, it came out sort of making it look like a shamrock, which worked for my purposes.  LOL!  Everyone totally thought I did it on purpose!  #Winning


Then I used a little more food coloring in the frosting to make it more festive for the holiday.

n


See...like I said...an easy and super fun idea!

Saturday, February 11, 2012

I'm A Sucker for Valentine's Day!

This week we got a notice about the impending Valentine's Day party at my son's daycare.  They told parents they'd "prefer" that we give the kids lollipops with the Valentine's cards (no idea why).  This idea came to mind immediately, I've been waiting for an excuse to try it.  I was really pleasantly surprised at how easy it turned out to be! 

So..it started with trying to get a decent picture of my three year old holding out his fist.  I couldn't get him to straighten it any further, because for some reason his fist was connected to his head and when he straightened one he tilted the other.  LOL!


Then, I uploaded it to photobucket and added some hearts and words.


Then, because I can't leave well enough alone, I added more words, lol.


Then I took it to Walgreen's to have them printed...and again, can't leave well enough alone so I added a border, which was just one of the choices once the picture uploaded.

Next, you have to cut a slit at the top of the fist;


And the bottom as well.  I noticed as I went on that if you can manage to curve the cut to match the way the fist is held out, it looks best.


Then, to stick in the sucker, you push from the back to separate the two slits, and stick it into the slot.  I'll probably put tape on the back to secure them as well.


And that's it!  How easy is that?  All that was left was to try to see what looked better...a small lollipop or a bigger one (the bigger one kind of bent the photograph but I had more of those than the small ones, so that made that choice, lol).


So, I hope you enjoyed my special Valentine's Day project, I love these and I can't wait to see what his teachers think of them!